
Popular Articles
Ultimate Guide to 360° Comprehensive Interior Detailing — Deep Clean, Sanitize and Protect Your Car’s Cabin
2026.02.04
Singapore Car Window Tinting Guide: Rules, Benefits, and How to Choose the Right Film
2026.02.04
The Complete Guide to Colour Wraps — Transforming Your Car’s Look with Style and Protection
2026.02.04
About Company
Colorfuul is a global leader in high-end automotive films, offering Color TPU PPF, Transparent PPF, PET Window Films, and Vinyl Wrapping. With exports to over 100 countries, we deliver consistent quality, competitive pricing, and professional service. Beyond production, we provide OEM/ODM customization, shaping the future of automotive aesthetics.
 mary@colorfuul.com
  86 13541196952
 How to Install Black Matte Vinyl Wrap
You've seen them on the road: cars with a deep, non-reflective finish that looks like it absorbs light. That stunning look isn’t a custom paint job; it’s a black matte vinyl wrap. Think of it as a high-tech, durable screen protector for your entire vehicle.
This approach delivers a unique style—from a true matte black wrap vs satin black finish—while also shielding your original paint from daily wear. A key benefit noted by industry experts is that the wrap is completely removable, helping to preserve the car's resale value.
The Critical First Step: Why a "Surgically Clean" Surface is Non-Negotiable
The most common vinyl wrap installation mistake happens before the wrap even comes out. A matte black finish shows every single imperfection, and one speck of dust trapped underneath will look like a permanent, noticeable bump. It’s the difference between a professional look and a frustrating failure.
A simple wash isn't enough. To achieve a truly clean surface, you must use a clay bar after washing. This special material glides over the paint and safely pulls out embedded grit and invisible contaminants that a normal wash leaves behind. This is the secret to prepping a car for vinyl wrap properly.
Just before applying the film, a final wipe with isopropyl alcohol removes any lingering oils or fingerprints. This critical step ensures the vinyl’s adhesive gets a powerful grip on the paint, which is your best defense against the edges peeling or lifting down the road.
Applying the Wrap: From Simple Panels to Challenging Curves
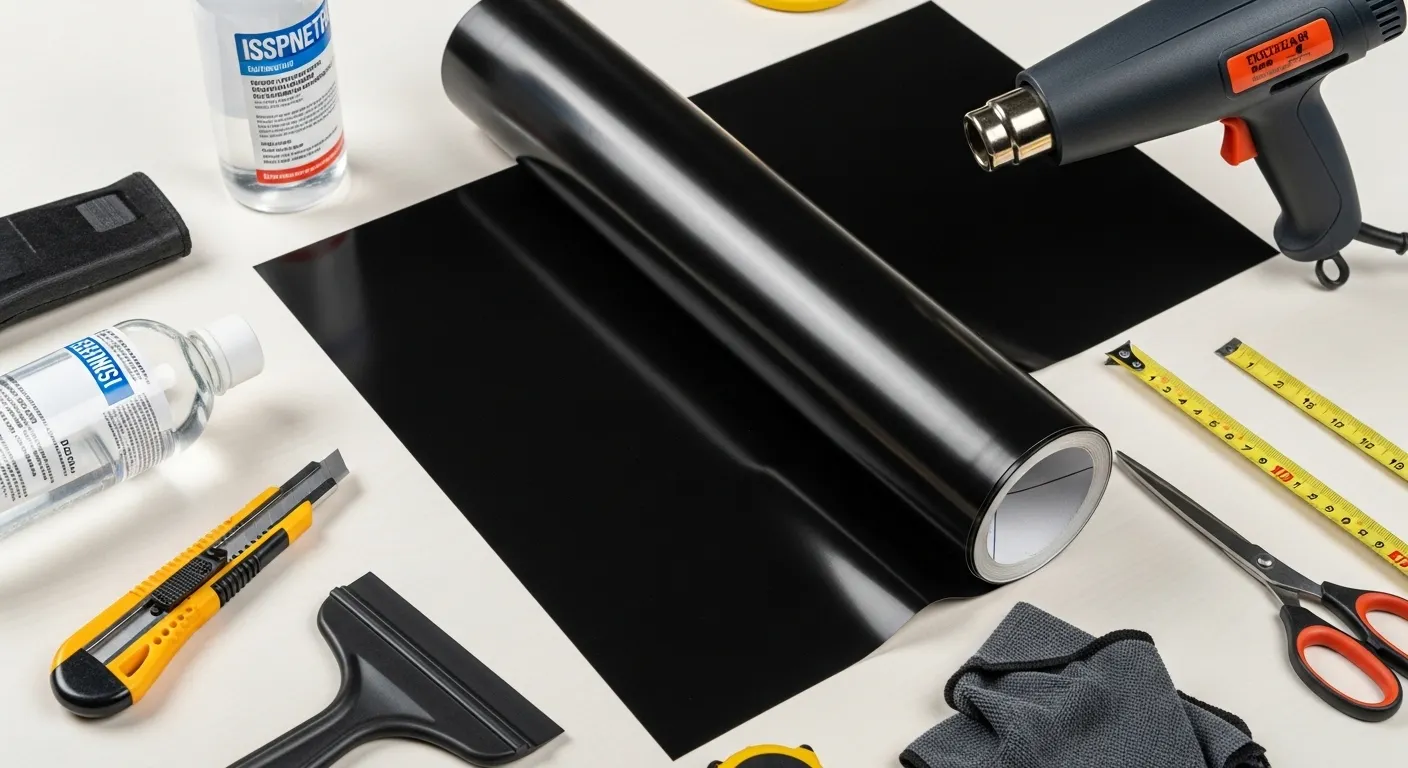
Once your car is spotless, the main event can begin. Your essential car wrapping tools list is surprisingly short: the quality vinyl film itself, a squeegee with a soft felt edge, and a heat gun.
On a large, flat panel like a hood, the process starts by laying the vinyl across the surface. From the center, use the squeegee with firm, overlapping strokes to smooth the material outwards. This methodical approach is the secret to applying vinyl wrap without bubbles, pressing the air out as you go.
Complex shapes like a side mirror are where skill truly comes in. This is where using a heat gun for car vinyl is critical. A little heat makes the material soft and pliable, allowing it to stretch cleanly over curves without wrinkling. Pros also use advanced methods like knifeless tape techniques for curves to create perfect edges without ever taking a blade to your paint.
Finishing Touches and Long-Term Care
The final installation step is post-heating, which locks the vinyl into place and ensures it conforms perfectly to every panel. This transforms the film into a precisely applied second skin.
Protecting this investment is straightforward. The key to proper matte vinyl wrap aftercare and cleaning is to hand wash only, avoiding automatic car washes and all wax products. Following this simple rule is the best way to ensure your wrap lasts for its full five to seven-year lifespan. Understanding the preparation, tools, and aftercare involved empowers you to make an informed choice and properly maintain your vehicle's unique finish.


